Indonesia
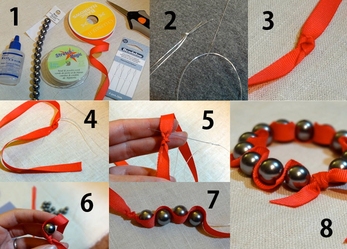
Ribbon And Pearl Bracelets
This weekend, why don’t we try something beautiful? Something that you, lovely Superkids, wear—both school and party—and be awesome with it! All you have to is follow the instructions carefully. Are you ready?
Tools & Materials:
• Needle
• 12-15 pieces plastic pearls size 12mm
• 90 cm of 5cm width ribbon
• 60cm long of elastic transparent yarn
• Transparent Superglue
Let’s Make It:
1. Prepare the tools and materials.
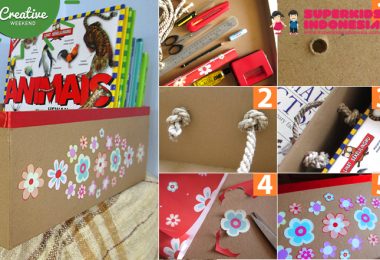
2. Thread the Stretch Magic cord through the eye of your needle. Pull the needle to the midpoint of the cord and knot the ends of the cord together 2-3 times.
3. Measure 14cms from the end of your ribbon and tie a knot, but do not pull the knot completely tight.
4. Feed your needle through the knot in your ribbon. Your needle should enter the knot on the side next to the 14cms tail, and come out on the side with the long length of ribbon. Pull the cord through the ribbon knot, stopping just before the knot in your yarn reaches the ribbon knot.
5. Tighten the knot in your ribbon all the way, securing the yarn cord inside of the ribbon knot. Pull on the needle end of the yarn, until the knot becomes lodged inside of the ribbon knot. To further secure the stretch magic, make a couple small stitches in and out of the ribbon, right at the base of the ribbon knot. Now you’re ready to add the beads!
6. Thread a pearl onto your needle and slide it down the cord until it is flush with the knot in your ribbon. Wrap the ribbon around the pearl and sew through the ribbon at the point where the ribbon touches the hole on the opposite side of the pearl.
7. To finish your bracelet, you can either knot the two ribbon tails together or tie them in a bow. Whichever style you choose, make sure that you tie it tightly. Trim the ends of your ribbon and seal them with a small amount of superglue.
Images: Creativme